

Prep time
5 min
Serves
2 - 3 ppl
Cook time
12 - 20 min
Ingredients
DUCKCHAR Moulard Duck Breast
Kosher salt
Pepper
Score duck breast skin
Step 1 - Score skin of DUCKCHAR Moulard Duck Breast. Exercise caution to avoid cutting into the meat while scoring. Approach this task deliberately, aiming to create as many scoring lines as possible. The art of scoring holds the secret to achieving that coveted crispy duck breast skin, as it facilitates the gradual rendering of fat during the cooking process. However, exercise prudence to prevent any inadvertent incisions into the meat. A practical guideline to follow is that if the underlying meat becomes visible through the scoring lines, your cuts are overly deep. Round off the preparation by generously seasoning both sides with kosher salt and pepper.
Sear duck breast
Step 2 - Select your preferred pan. For achieving the perfect sear on duck, we lean towards a cast iron or steel skillet. In the case of cast iron, ensure that your burner flame provides ample heat to properly warm the skillet. Proceed to pan-sear DUCKCHAR Moulard Duck Breast according to your desired level of doneness; we find medium rare to be optimal. With the skin side down, place the duck breast in the skillet over medium-high heat. Throughout the cooking process, diligently spoon off the rendered duck fat as the duck breast cooks. This precious rendered fat can be stored for future culinary endeavors; simply filter and refrigerate it once it has cooled.
Continue cooking until the duck skin achieves a thin, crispy, and golden state. This phase typically spans 7 to 10 minutes if your goal is to attain a medium rare finish.
Step 3 - Turn the duck breast over and pan-sear with the skin side facing upward. Once the internal temperature of the duck breast reaches 131 degrees F, carefully take the duck breast out of the cast iron skillet.
Gently drape a piece of foil over the DUCKCHAR Moulard Duck Breast, allowing it to rest loosely. Allow the pan-seared duck to rest for 5 minutes. Throughout this resting interval, the temperature of the duck breast will ascend to 135 degrees F, culminating in a flawlessly succulent medium rare outcome. Proceed to slice, serve, and relish every bite!
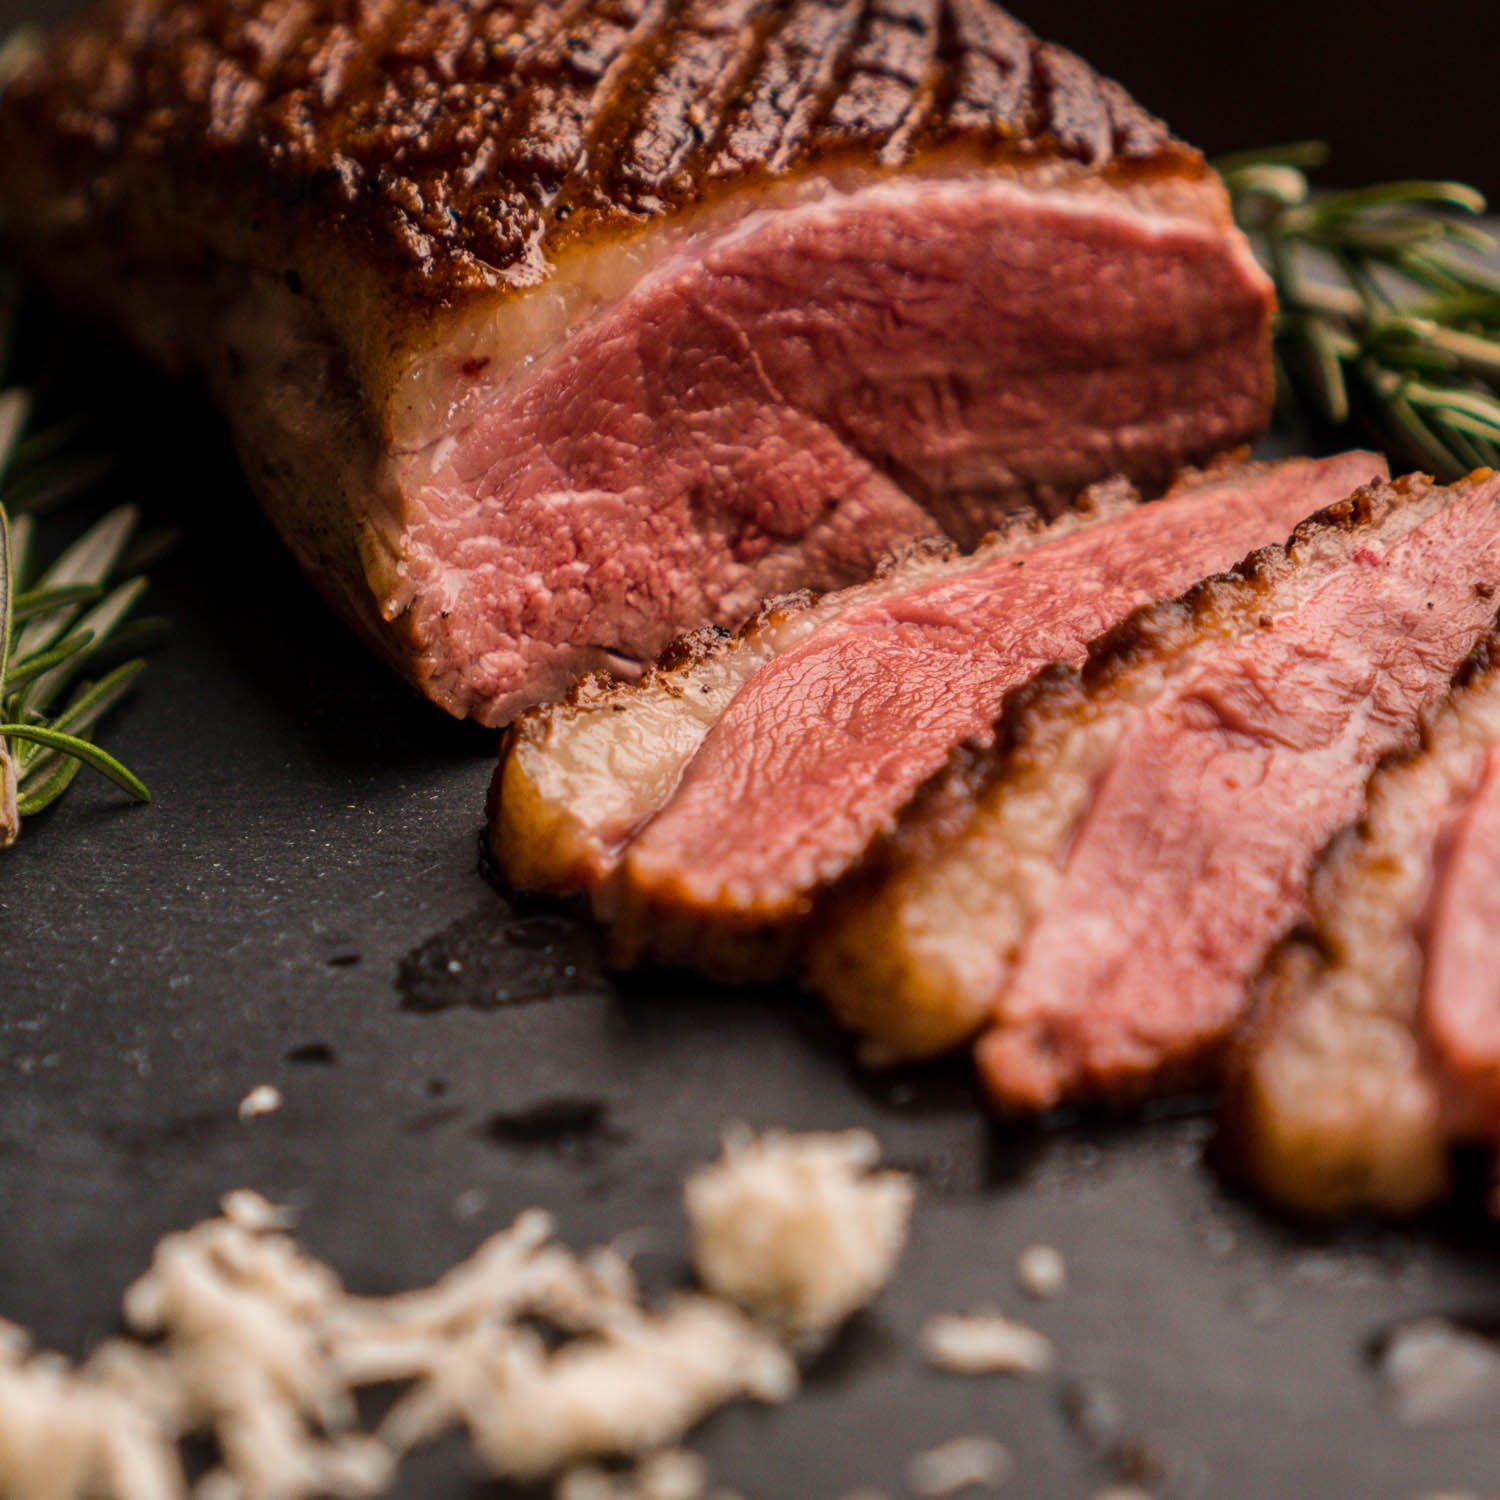
Pan Seared Duck Breast
The lowdown.
Cooking duck breast in the pan is a quintessential and arguably the most delectable and straightforward method for preparing this delicacy. Even if you've never delved into the art of searing duck breast in a skillet, you're likely familiar with the concept of crafting a beautifully seared duck breast. This is because pan-searing DUCKCHAR Moulard Duck Breast is just as effortless, uncomplicated, and recognizable as searing a premium steak. It's no wonder Moulard Duck Breast is endearingly known as "duck steak." The culinary process and ultimate outcome mirror that of a steak version—sear both sides of the duck breast, aiming for a medium rare doneness.
Just like with steak, the finest seared duck breast recipe relies on simplicity. A mere sprinkling of salt and pepper is all that's required. There's no need for elaborate seared duck breast sauces or marinades. The robust flavor of the Moulard duck stands strong on its own. As you embark on the journey of properly searing duck breast, there are a few additional elements to consider, given the delightful bonus of achieving crispy, succulent duck skin. Are you prepared? Let's dive into this delectable duck breast recipe.
How to cook duck breast
A general guide with tips and tricks to help you cook duck like a pro chef.
Preparing duck breast
Duck breast has a similar appearance and texture to red meat, and can be safely consumed at medium-rare. When cooked properly, the meat is moist and juicy, with a crispy skin. To achieve this, it's important to score the fat on the duck breast. This helps the fat to melt and crisp up more evenly. Ducks have a lot of fat to help them fly long distances, but too much can be overwhelming. Scoring the fat increases the surface area exposed to heat, allowing it to melt more quickly.
To retain some fat under the skin, we make shallow cuts in a crosshatch pattern across the surface of the duck. This is done with a sharp knife, with minimal pressure applied, just enough to barely break through the skin. If you want to render more of the fat, make deeper cuts.
Although you may not intend to consume the fat, it should not be removed before cooking. The fat layer protects the meat and allows for even cooking at a lower temperature, which is ideal for duck which is best served medium-rare. If you cut through to the flesh, the meat will be exposed to direct heat and overcooked before enough fat has rendered out. So it's important to be gentle when scoring the skin.
After making the cuts, season the duck with kosher salt and black pepper. Apply more salt on the fat side and less on the flesh side. Keep in mind that a lot of the salt on the fat side will melt away during cooking, so it's essential to use more than you might expect to ensure full seasoning. This is all the preparation that's required before cooking.
Extra crispy skin
To encourage a crispy finish and a better texture, we always do these preparations the night before cooking. Then we allow the breast to rest on a baking sheet uncovered overnight in the fridge. This step draws out moisture from the meat and improves the taste and texture of the final dish. Just to be clear, this is extra step. It’s not necessary.
Cooking duck breast
The terms "seared" or "pan-roasted" duck breast may be misleading as they suggest using high heat. However, this method uses low heat to cook duck breast in a pan. Cooking duck breast at a high temperature causes the flesh to cook too quickly before enough fat has been rendered out, resulting in a thick layer of fat over tough meat. By using gentle heat, the fat can render off while the heat slowly transfers to the flesh its covering. In short, low heat allow you to achieve a more even cook and crispy skin. Just to be clear, if the skin isn’t crispy, it’s not right. The key to successfully cooking duck breast at home is figuring out how to achieve the perfect result using your own stovetop or electric burners.
Temperature
Cooking with high heat is not suitable for duck breast, but even when using "low to medium-low heat," there is a range of variations. The temperature can be too low, which can lead to an extended cooking time and cause the duck to overcook before enough fat is rendered. On the other hand, high temperatures leave excess fat behind. To find the ideal temperature, pay attention to the sound of the sizzles while cooking. Start the cook with the duck in a cold pan. As the pan heats, the crackling pops will begin. A steady stream of crackling pops is good. What you don’t want are the sound sputtering pops of a high heat steak cook. Once you have a couple of good runs cooking duck breast, you’ll know the sound. When the skin is crispy and golden, flip the duck breast. This step will take 10 to 15 minutes depending on a number of factors like the type of duck, the pan, and temp.
However, when you flip the duck breast crank up the heat slight and cook until the internal temp reaches 130 degrees F. At this point you can remove the duck breast from the heat and cover it loosely with foil for 10 minutes. During this resting phase the temp will rise and reach a perfect medium rare finish.
Slicing and serving duck breast
Always cut the duck breast against the grain. The meat is more tender that way. Now, sometimes you’ll note that fancy restaurants cut the duck breast longwise to give it a different look and perhaps elevates the styling of the dish when it’s presented to you. We can’t hate on that. Give it a try and see what you think. But, for general cooking and presentation, slicing against the gran is ideal.
Pan sauce
While the duck is resting, you’ll have nothing to do but wait. Or you could make the pan sauce of your dreams during that time. Check out our duck steak pan sauce recipe.
Shop
The recipe ingredients
DUCKCHAR Moulard Duck Breast tastes like premium steak with a rich duck flavor twist. But it’s not red meat. It’s poultry. And it takes as little as 15 minutes to cook.
14 - 18 oz avg / breast
Air-chilled
100% vegetarian diet
No antibiotics, no hormones
$75 min order for meat products